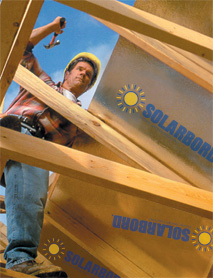
West Fraser structural panels are to be installed according to the APA’s (The Engineered Wood Association) Construction Guide E30 and the appropriate building code. Below are some key installation points.
Solarbord on Roofs
- Make sure rafter alignment is uniform and square.
- Prior to application, acclimatization of panels to surroundings for at least 24 hours is recommended.
- A minimum of 1/8″ spacing is required at the ends and sides of panels.
- All panels must be continuous over two or more spans.
- Install panels perpendicular to the roof rafters.
- Install Solarbord panels with the foil side facing the attic.
- Roof clips are recommended and may be required – check your local code requirements.
- Fasteners are to be 3/8″ in from edges and corners.
- Use 8d nails to fasten Solarbord to the rafters. Fastener spacing* (minimum typical spacing is 6″ o.c. along edges and 12″ o.c. in the field but local and high wind requirements must be followed).
- A minimum of a 2′ wide panel is required at the peak. (Wind loads are the greatest at the peak and eves.)
- Check for “shiners” and refasten or add additional fasteners.
- Cover the roof sheathing as soon as possible with shingle underlayment (or #15 roofing felt) to protect panels from weather. If construction delays are anticipated, cover with #30 roofing felt.
- Check local building codes for minimum ventilation requirements and build accordingly.
- Spraying foam insulation to the underside of Solarbord will negate all benefits of the radiant barrier and my reduce or void some shingle warranties.
- Provide 3/4″ expansion joints for every continuous section of panels exceeding 80 feet in length.
- Always wear the appropriate safety equipment.
- For roofs over 80′ in length, see APA U425 for details.
Solarbord on Gables
- Install the Solarbord panels with foil side facing in, toward the attic space.
- Allow 3/4″ air space between foiled surface and all other building materials in the attic.
- Maintain 1/8″ spacing between panel ends and edges.
- Keep Solarbord panels protected from the elements prior to, during and after installation.
- Make sure the support alignment is uniform and square.
- Fastener spacing*
*Consult your local building codes for local requirements and specifications and the APA Construction Guide E30
Prevent Buckling with Proper Spacing
Try our free online tool, Onsite. Great while on the jobsite or training new employees, Onsite has lots of videos and information, plus it focuses on the 3 most common mistakes made when installing OSB. There are videos for Sub-Floor, Wall and Roof applications plus a Trouble Shooting section. The online tool is a guide only. Always consult the local building codes, design professional’s specifications or the APA’s E30 for details that may apply to your application.
End Uses
The main application for Solarbord is for roof sheathing and external walls.
Installing Solarbord on gables reduces heat gain through the attic even more. Solarbord is particularly effective on gables with southern exposures that endure solar rays for prolonged periods. (Please see installation guide.)
Installing Solarbord as exterior wall sheathing may provide benefits but there are important aspects to consider. A minimum of 3/4″ air space must be maintained in front of the foil surface for any radiant barrier to work. If the foil faces the inside of the building, it will be very difficult to ensure there is the required air space between the foil and the insulation so in wall applications it is best to install the foil facing out. To maintain the required 3/4″ airspace strapping/furring strips must be installed to the foil side. Install the house wrap (if required by your local building code) on the outside of the strapping/furring strips. The wood strips will create the required air space depth and then the finished siding can be installed.
Notes:
- Solarbord is not considered a house wrap or moisture barrier.
- The extra thickness resulting from the strapping/wood strips may impact the window and door frame depths.
- Any spacing at the top and bottom of the wall created by the extra depth may require the steps to prevent insects, etc., from getting behind your finished siding.
- Be sure your finished siding is acceptable over this method.
Resources
Visit the resources page for more information on product documents, forest certification, APA publications, seminars & trade shows.