Menu

TruFlor pointSIX

T&G SUB-FLOORING WITH PATENTED ENGINEERING

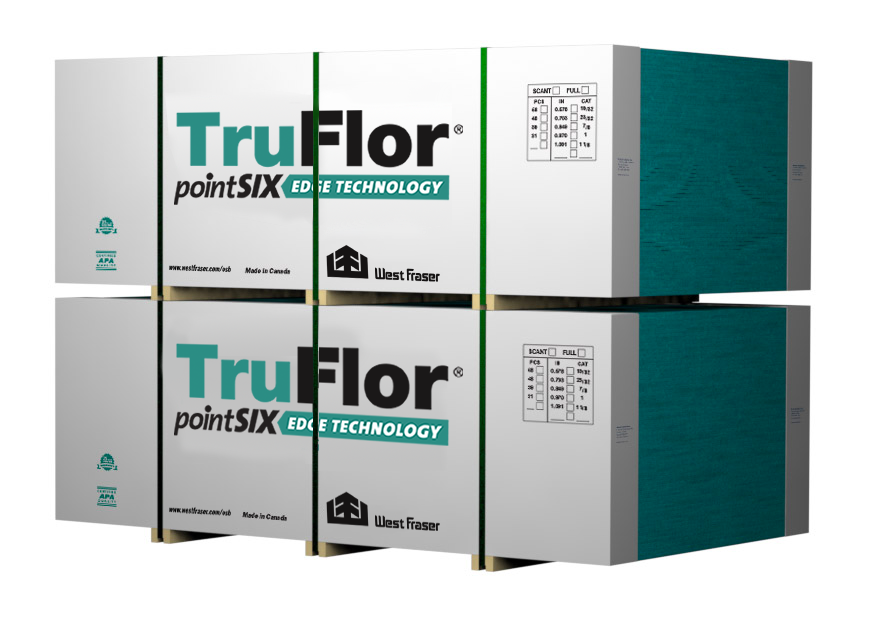
TruFlor pointSIX® is a commodity T&G sub-floor that offers value, strength and durability on the job site. Manufactured with a 0.6mm taper on the panel edges to offset edge swell, TruFlor pointSIX consistently delivers the quality and performance builders need at a price point that represents value.

WHAT IS POINTSIX TECHNOLOGY?

TruFlor pointSIX features a patented tapered edge that is designed to offset the effect moisture has on panel edges. The pointSIX name comes from research proving a nominal 0.6mm taper to be effective against edge swell. If the panel is exposed to rain or humidity, the tapered edges have room to expand and become flush with the surface without ridging.

FEATURES AND BENEFITS

  • PointSIX taper on the 4-foot and 8-foot edges to offset edge swell
  • The 4×8, 23/32 T&G panels are engineered to be used in sub-floor applications (19/32, 7/8 and 1-1/8 TruFor pointSIX is available in some markets)
  • TruFlor pointSIX’s profile is designed for fast and easy installation
  • Comes with a 25-year limited warranty
  • Able to withstand normal construction delays without structural properties being affected
  • Meets or exceeds PS2 standards and is APA grade stamped as an exposure 1 panel
  • TruFlor pointSIX provides quality and performance to control costs and cycle times
  • Turquoise Edge Seal® for easy identification
  • No added urea-formaldehyde resins, CARB exempt

TruFlor pointSIX is suitable for carpet, wood strip or parquet flooring (must be installed to manufacturer’s and/or NWFA instructions). Vinyl flooring requires the use of the vinyl manufacturer’s approved underlayment. Follow material manufacturer’s instructions. If finished floor is to be adhesive-bonded resilient flooring, always use an approved underlayment, following the manufacturer’s instruction, over West Fraser sub-floor OSB.

  • Sizes / Lengths:
    4×8
  • Thickness:
    19/32, 23/32, 7/8, 1 1/8
  • Edge Seal Color:
    Turquoise
  • Warranty:
    25 Year Limited Warranty
Have any questions regarding this product?
Contact us today.
  • Product Documents

  • FAQ

    1. I have installed my sub-floor with the Grade Stamp up, does that affect the structural integrity of the panel or my floor?
    2. What is considered ‘Normal’ exposure when it comes to the amount of moisture a sub-floor receives?
    3. My sub-floor has seen a lot of rain, is there something I should be doing?
    4. My sub-floor panel has some flaking and the edges look swollen, do I need to replace my sub-floor?
    5. Can I paint my sub-floor?
    6. I am concerned about my OSB sub-floor off gassing Urea Formaldehyde.
    7. Should I use an adhesive when installing my sub-floor?
    8. How much space should I leave in between panels when installing my sub-floor?
    9. I notice a strength axis indicated on my panels stamp. What does that mean?

    I have installed my sub-floor with the Grade Stamp up, does that affect the structural integrity of the panel or my floor?

    West Fraser T&G sub-floor panels installed with the grade stamp up does not affect the structural properties of the panel. All West Fraser sub-floor panels are marked with “this side down” for two reasons. First, the tongue and groove on West Fraser’s sub-floor are offset slightly from the center of the panel. If some panels are installed grade stamp up and some grade stamp down, there may be a small lip to contend with. Secondly, when the grade stamp is installed facedown, it allows building inspectors to easily read the information indicated on the panel stamp once the flooring is in place.
    Top

    What is considered ‘Normal’ exposure when it comes to the amount of moisture a sub-floor receives?

    Unfortunately, there is no definitive answer because there are too many climate variables across the country. Exposure 1 panels will withstand normal delays in construction without the structural properties of the panel being affected. If your sub-floor gets wet, it is imperative that the panels be allowed to dry out completely. If the floor gets a lot of rain there could be some swelling at the edges, however, this does not affect the structural properties of the panel. After the house has been closed in, the floor has been completely dry and ready for the finished flooring any swollen edges can be sanded level without affecting the structural properties of the panel.
    Top

    My sub-floor has seen a lot of rain, is there something I should be doing?

    Until the house is dried in the best practice is to remove any standing water using a broom or squeegee. It is important that sanding should not be done until the house is completely dried, drywall and painting is done and the HVAC is running. Sanding before that will open the cells in the wood and allow more moisture absorption and that means you will likely see more swelling.
    Top

    My sub-floor panel has some flaking and the edges look swollen, do I need to replace my sub-floor?

    No, you do not need to replace your sub-floor. When a sub-floor is exposed to moisture your panels might experience some surface flaking and the edges might swell. These do not affect the structural properties of your panel. It is common practice after the sub-floor has completely dried to sand the edges so they are even, however there is no need to worry about minor surface flaking as they are cosmetic and not structural.
    Top

    Can I paint my sub-floor?

    Yes, all West Fraser T&G sub-floor panels can be painted. The industry usually recommends a high-quality acrylic latex paint and primer. It’s important to note that the face stamps are ink and not suppose to come off and they may be difficult to cover.
    Top

    I am concerned about my OSB sub-floor off gassing Urea Formaldehyde.

    There is no added urea formaldehyde in West Fraser’s OSB panels. It is not possible to make OSB with urea formaldehyde because it is not a water proof resin. OSB is approximately 5% resin and 95% wood fibre. Testing by independent labs show that formaldehyde from OSB is essentially zero. West Fraser’s OSB is also exempt from CARB (California Air Resource Board) and other strict emission requirements around the word.
    Top

    Should I use an adhesive when installing my sub-floor?

    Yes, using an adhesive when installing sub-floor panels is recommended and may be required. At a minimum, sub-floor adhesives must meet current industry test standards. If an adhesive is used, apply only enough to install two or three panels at a time and fully fasten the panels before continuing. We also recommended running a small bead of glue in the groove of the panels during installation for added strength and stiffness to the floor.
    Top

    How much space should I leave in between panels when installing my sub-floor?

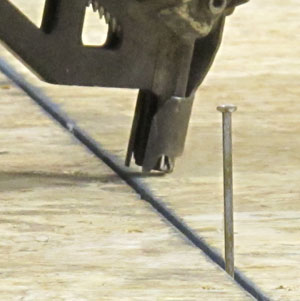
    You must space panels 1/8” apart on the 4’ edges. An easy way to ensure prospering spacing is by using a 10d nail as a spacing guide. The T&G profiles are self spacing.
    Top

    I notice a strength axis indicated on my panels stamp. What does that mean?

    When you are installing your sub-floor panels they should be installed over two or more spans with the strength axis perpendicular to the supports.
    Top
  • Installation

    West Fraser structural panels are to be installed according to the APA’s (The Engineered Wood Association) E30 – Installation Instructions (Engineered Wood Construction Guide), the appropriate building code and/or the design professional’s specifications.

    Below are some key installation points and tips

    A nail makes a great space guide.

    A nail makes a great space guide.

    1. Space panels 1/8″ apart on the 4′ edges. Using a 10d nail as a spacing guide is a quick and easy way to ensure proper spacing. (See photo and watch video below.)
    2. Lightly butt the T&G together.
    3. Ensure the joists are aligned, uniform, spaced correctly, level and square before installing any sub-floor.
    4. Install panels with the major strength axis perpendicular to supports.
    5. Install T&G panels with the APA grade stamp down.
    6. Fastener Spacing – consult your local building codes for local requirements, the E30 – Installation Instructions (Engineered Wood Construction Guide) and/or your design professional’s specifications.
    7. Fasteners must be within 3/8″ from edges and corners to ensure the panels stay flat to the joists.
    8. Check for shiners and replace or add additional fasteners.
    9. If using Rimboard, refer to APA’s Floor Panel T&G Trim Guidelines.
    10. Gluing sub-floor panels is recommended and may be required. At a minimum, sub-floor adhesives must meet current industry test standards. If glue is used, apply only enough glue to install 2 or 3 panels at a time and fully fasten the panels before continuing.
    11. Running a small bead of glue in the groove of the panels during installation adds strength and stiffness to the floor.
    12. Provide 3/4″ expansion joints for every continuous section of panels exceeding 80 feet in length. See APA U425 for details.

    Try our free online tool, Onsite. Great while on the jobsite or training new employees, Onsite has lots of videos and information, plus it focuses on the 3 most common mistakes made when installing OSB. There are videos for Sub-Floor, Wall and Roof applications plus a Trouble Shooting section. The online tool is a guide only. Always consult the local building codes, design professional’s specifications or the APA’s E30 for details that may apply to your application.
    SubFloor Installation

    One of the most common mistakes made during the installation of sub-floor structural panels is not leaving a gap along the 4′ ends of the panels by butting the panels together. Not leaving space to allow for expansion can lead to potential problems. Butting panels tightly together can cause callback issues that add cost and impact the bottom line. TruFlor panels are sized to allow for this spacing and leaving 1/8″ between panels is a requirement. Using a 10d nail as a space guide is a quick and easy way to ensure spacing.

    These publications by the APA The Engineered Wood Association M300 (Cut Callbacks with Proper Spacing), G440 (Brace Walls with Wood), E305 LA (Construyendo un sistema de piso solido sin chillidos) and TT-024 (Heavily Loaded Drywall Carts) provide excellent information and guidance to anyone using structural panels and should be read in addition to the installation requirements. Downloadable PDF available in APA Publications section.

    The following floor coverings may be installed over TruFlor Sub-Flooring

    • Commercial and residential carpet with under pad
    • Ceramic tile and lightweight concrete*
    • Hardwood floors*, (Solvent based adhesives are recommended when gluing parquet hardwood flooring)
    • Vinyl flooring requires a suitable underlayment**

    Always follow the floor covering/installation product manufacturer’s application recommendations.

    * Follow the industry and flooring manufacturer’s installation instructions with special attention to the requirements regarding the job-site moisture conditions for the building, sub-floor and finished flooring before, during and after installation.

    ** The APA L335M for underlayment installation can be found in the Resources under the APA.

    Prevent Buckling with Proper Spacing

    Resources

    Visit the resources page for more information on product documents, forest certification, APA publications, seminars & trade shows.