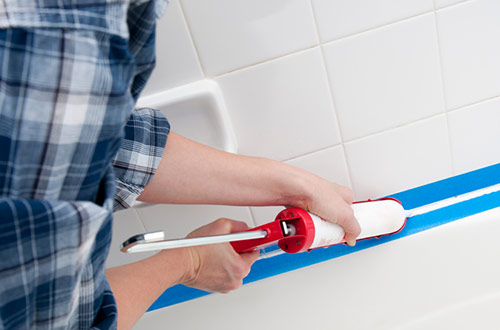
Sealing the holes in your home’s building envelope will help to reduce air leakage. Properly sealing bathroom, kitchen and other plumbing features will prevent damage from moisture as well as the formation of mold and mildew. Siliconized caulk is available for both indoor and outdoor applications. Knowing how to correctly select and apply caulk will ensure that your build is properly protected from moisture and the elements.
The Right Product for the Right Seal
Silicone-based caulks have been the industry standard for use on trim installations and windows. While they are effective, they are messy to install and only some can be painted so check before you make a product choice.
Polyurethane-based sealants are becoming more popular for outdoor sealing because they adhere better than silicone. They don’t shrink over time and you can apply paint directly to them.
For internal jobs like bathrooms and kitchens, silicone sealants are a good choice. They come with an antimicrobial option which prevents the formation of mold and mildew. They are easy to remove and replace should additions be necessary or when the caulk gets dirty.
Acrylic caulk can only be used for home interiors. It isn’t waterproof or flexible and has been known to crack over time. It is mainly decorative and can be painted.
If you want a versatile indoor caulk, opt for a hybrid acrylic/silicone mix which is easier and less messy to work with, it stays flexible, is waterproof and can be painted.
Similar to the hybrid caulks are water- and solvent-based caulks, many of which also serve as adhesives. These have waterproof properties and are easier to work with.
If you are caulking electrical outlets, be sure to opt for fire-resistant caulk.
Always follow the manufacturer’s instructions as each product is unique and you want to avoid expensive callbacks.
Prepare the Surface
Always clean and dry the surface before applying caulk and sealants. Dirt and debris may prevent the caulk from sealing properly and may not look professional.
If you want a straight line, use tape to mask off an area. Tool the edges of the bead level with the tape and always remember to peel the tape off before the caulk dries or you may peel the caulk off too.
Remove old caulk before adding a new layer. Cut along both sides of the old bead with a utility knife to break the seal. Pull the old caulk from the joint and use a paint scraper to get any remnants out. Once the old bead has been completely removed, clean the surface with mineral spirits and an abrasive pad to remove residue. Wait until the surface has dried before applying a new bead.
Application Tips
Hold the caulking gun at a 90-degree angle to the surface. Don’t push or pull, but find a sweet spot between the two.
Utilize release agents which prevent caulk from adhering to sprayed areas so you can accurately shape your joint for a more professional finish.
Caulk-shaping tools come in different sizes to allow you to create a bead that is the perfect size. The tools are short wooden dowels which you wet, then use the rounded end of the dowel to draw over the bead to remove excess caulk give the bead a concave shape.
Rubber shaping tools help to clean away excess caulk and allow you to choose from a variety of bead shapes to suit your desired finish with no edge marks.
When caulking a bathtub, fill the tub with water to weight it down and open up the joint. When you apply the caulk, ensure that it is in full contact with the vertical and horizontal surfaces for a proper seal. Wait until the caulk is dry before emptying the bath.
When sealing larger joints (bigger than 1/4-in.), use a foam backer rod as a filler and apply the caulk over the top. You use less caulk and the rods are an inexpensive way to fill the empty space while providing an aesthetically-appealing finish. The rod will also help the caulk to withstand movement and will prevent joint failure.
Most caulking guns don’t extend all the way up the tube, leaving about ½-inch of caulk at the bottom. You can use this excess caulk by removing the tube from the gun and dropping a piece of 1 ¼-inch thick doweling into the tube. Put the tube back in the gun and squeeze out the last little bit of caulk to save money.
